
The Ultimate Design Crime: Why It’s Time to Banish 'The Big Light'
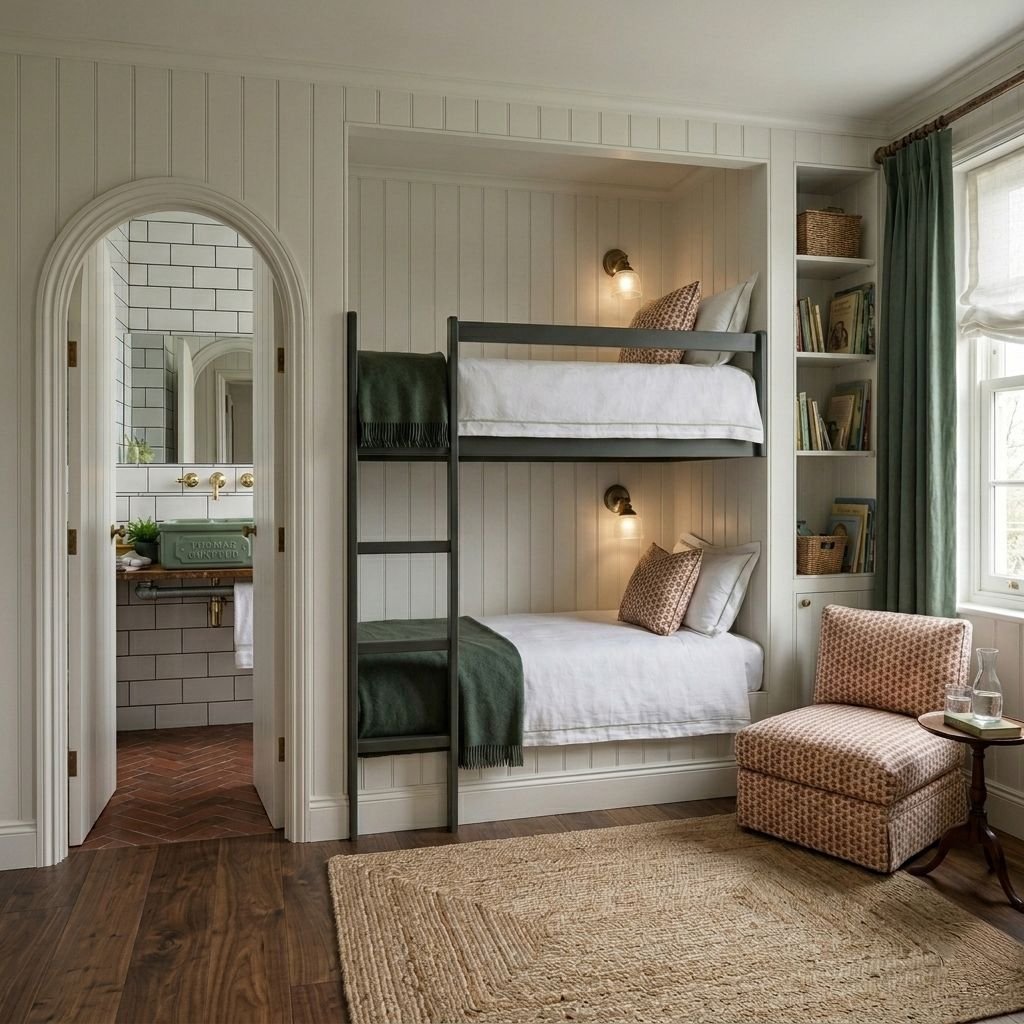
Bunkbed design by The Layered Look featuring task lighting for bedtime reading
We have all experienced it. You return home after a frantic day, looking forward to winding down. You step into the living room, flip the main switch on the wall, and your beautiful, cosy sanctuary is instantly flooded with a harsh, rather interrogational glare.
In the interior design world, we refer to this as "The Big Light" dilemma.
While central ceiling fixtures certainly have their place during a deep clean or an emergency search for lost keys, relying on them for evening ambiance is one of the most common design missteps you can make. Today, we are breaking down how to create an inviting, beautifully layered lighting scheme that makes you feel instantly at ease. However, before we even touch a lamp switch, we must look to the sun.
1. Step One: Auditing the Natural Light in Your Home
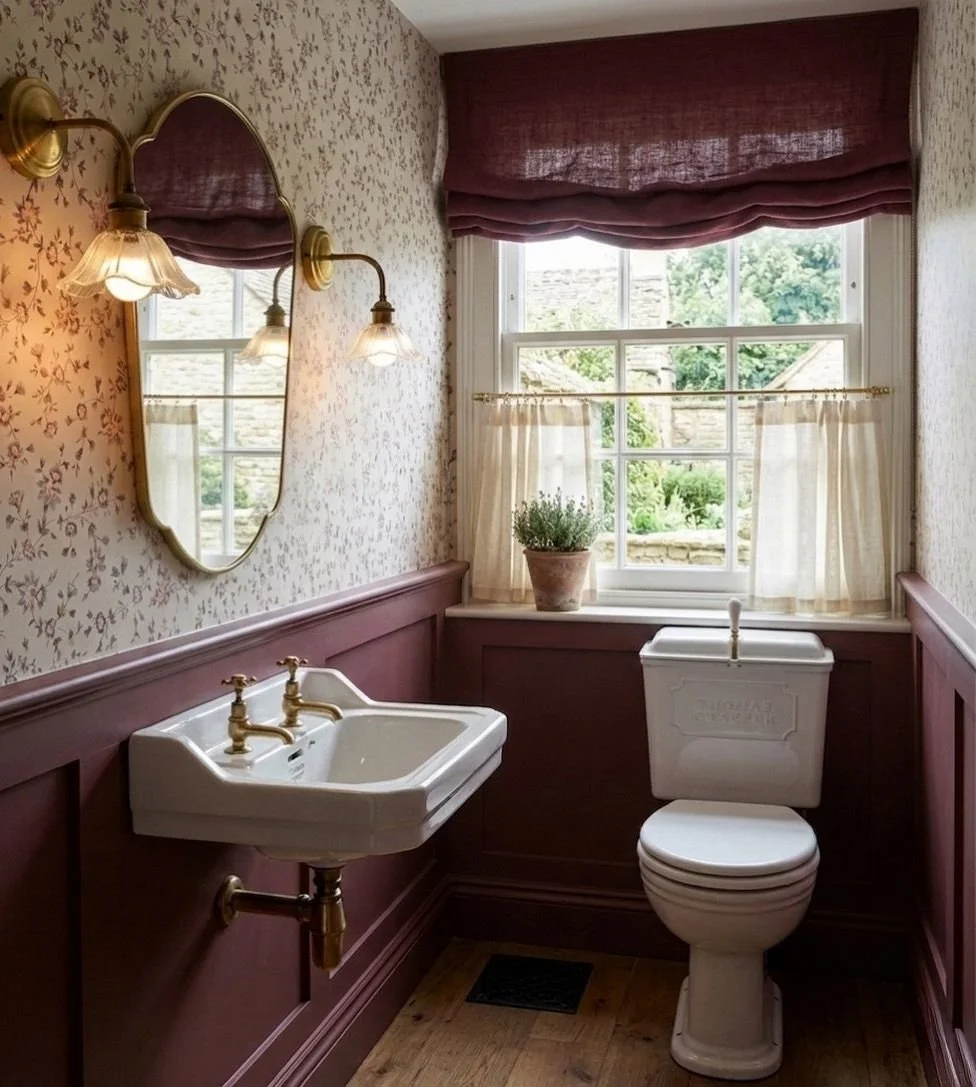
Guest lavatory designed by The Layered Look
Before mapping out where to place a single lamp, one must first get to know the natural light unique to your property. Light is entirely dynamic, and understanding how it moves through your house across the day is the secret weapon of any interior designer.
Take a weekend to observe how the sun travels through your rooms. You will quickly begin to notice the inevitable dark corners, when certain spaces will require artificial assistance, and where you naturally tend to spend your time as the afternoon fades into evening.
The aspect of your room dictates the quality of natural light it receives, which fundamentally changes how you should approach your lighting layout:
North-Facing Rooms: These spaces receive a cool, consistent, and slightly bluish light all day. Because north-facing rooms can feel rather chilly, you will need to introduce artificial warmth earlier in the afternoon to soften the space.
South-Facing Rooms: The absolute darling of the property market, south-facing rooms enjoy warm, bright light for the majority of the day. Here, artificial lighting is purely an evening affair.
East-Facing Rooms: You will experience beautiful, bright morning light, followed by long, cool shadows in the afternoon. If this is your main living area, you will need task lighting ready for that post-lunch dip.
West-Facing Rooms: These spaces are quiet and cool in the morning but are bathed in a rich, golden glow by late afternoon.
By auditing this natural movement, you can position your seating and your lamps precisely where they are needed most, working in harmony with the sun rather than against it.
2. The Mood Killer: Why Overhead Lighting Flattens a Room
Boot room designed by The Layered Look showing how you can use lighting to highlight art within a space
Once the sun sets, the temptation is to simply flood the room from above. However, the primary issue with a single, central overhead light is direction and uniformity. It casts unflattering, downward shadows, flattens architectural details, and strips away the natural depth of a room. Instead of encouraging relaxation, a space bathed entirely in overhead light triggers a subtle alertness response, making it feel more like a sterile waiting room than a home.
To build a space you genuinely want to linger in, one must think in layers. A well-designed room relies on three distinct types of lighting:
Ambient: Your background glow, achieved through dimmable wall lights or subtle architectural lighting.
Task: Focused light where you actually require it, such as a sleek reading lamp by the armchair or under-cabinet LEDs in the kitchen.
Accent: The drama. Think subtle spotlights highlighting artwork, or a warm light tucked inside a bookshelf.
By scattering lamps at varying heights around the room, you create pockets of warmth and soft shadows. This instantly makes a room feel larger, richer, and infinitely more intimate.
3. The Chameleon Effect: How Light Alters Paint Colours
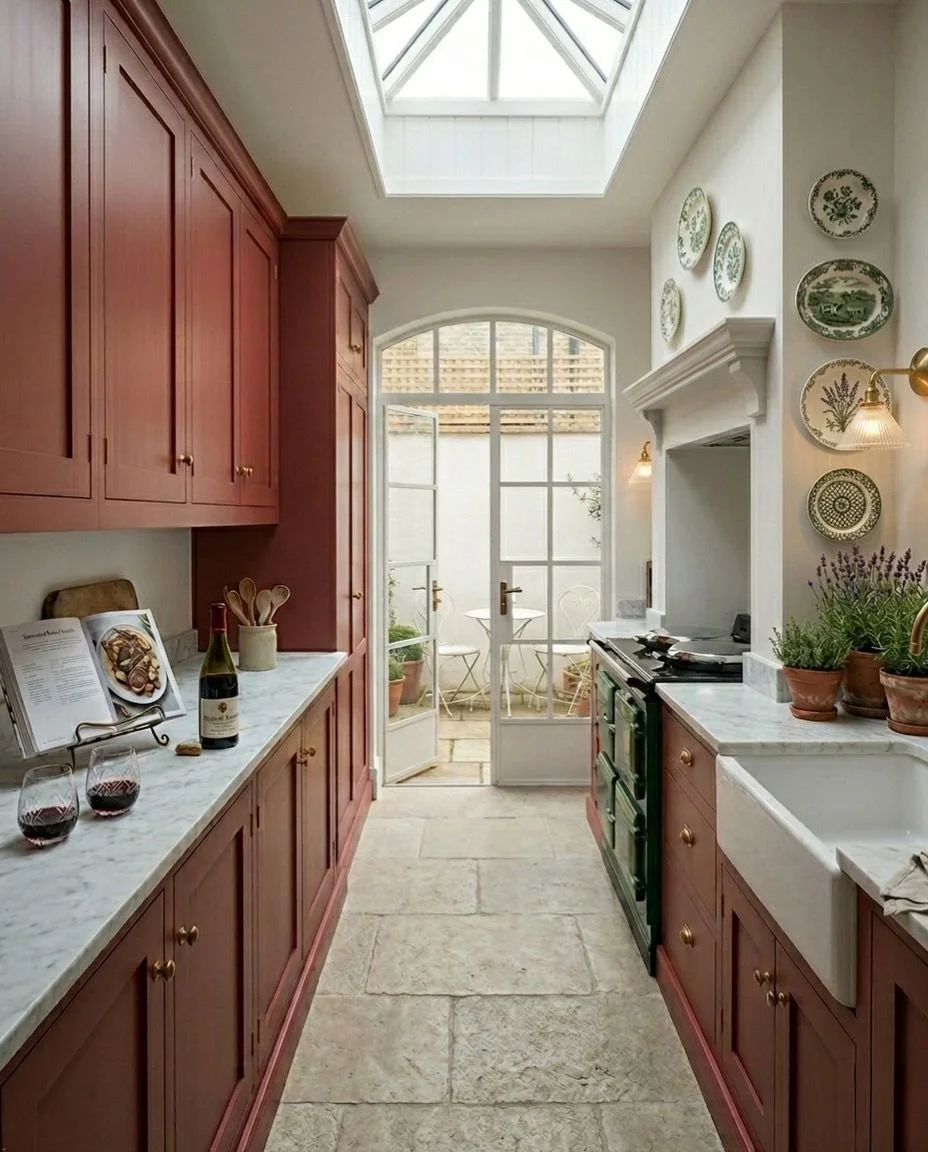
Narrow kitchen design by The Layered Look
Have you ever selected the "perfect" neutral paint in the showroom, only for it to look entirely different once it is on your walls? You can thank the interaction between light and colour pigment for that.
The lightbulbs you choose fundamentally alter how paint colours behave. A room painted in a gorgeous, warm greige can instantly turn a sickly, cold blue-grey under the wrong light. Conversely, a crisp, modern white can look muddy and yellow if the lighting is not properly balanced.
When designing a space, we always map out how the paint choices will interact with both natural daylight and your evening artificial light. If you want your colours to look true, rich, and sophisticated, you must look at the numbers on your lightbulb boxes.
4. The UK Guide to Buying the Perfect Bulb (Goodbye, Sterile White)
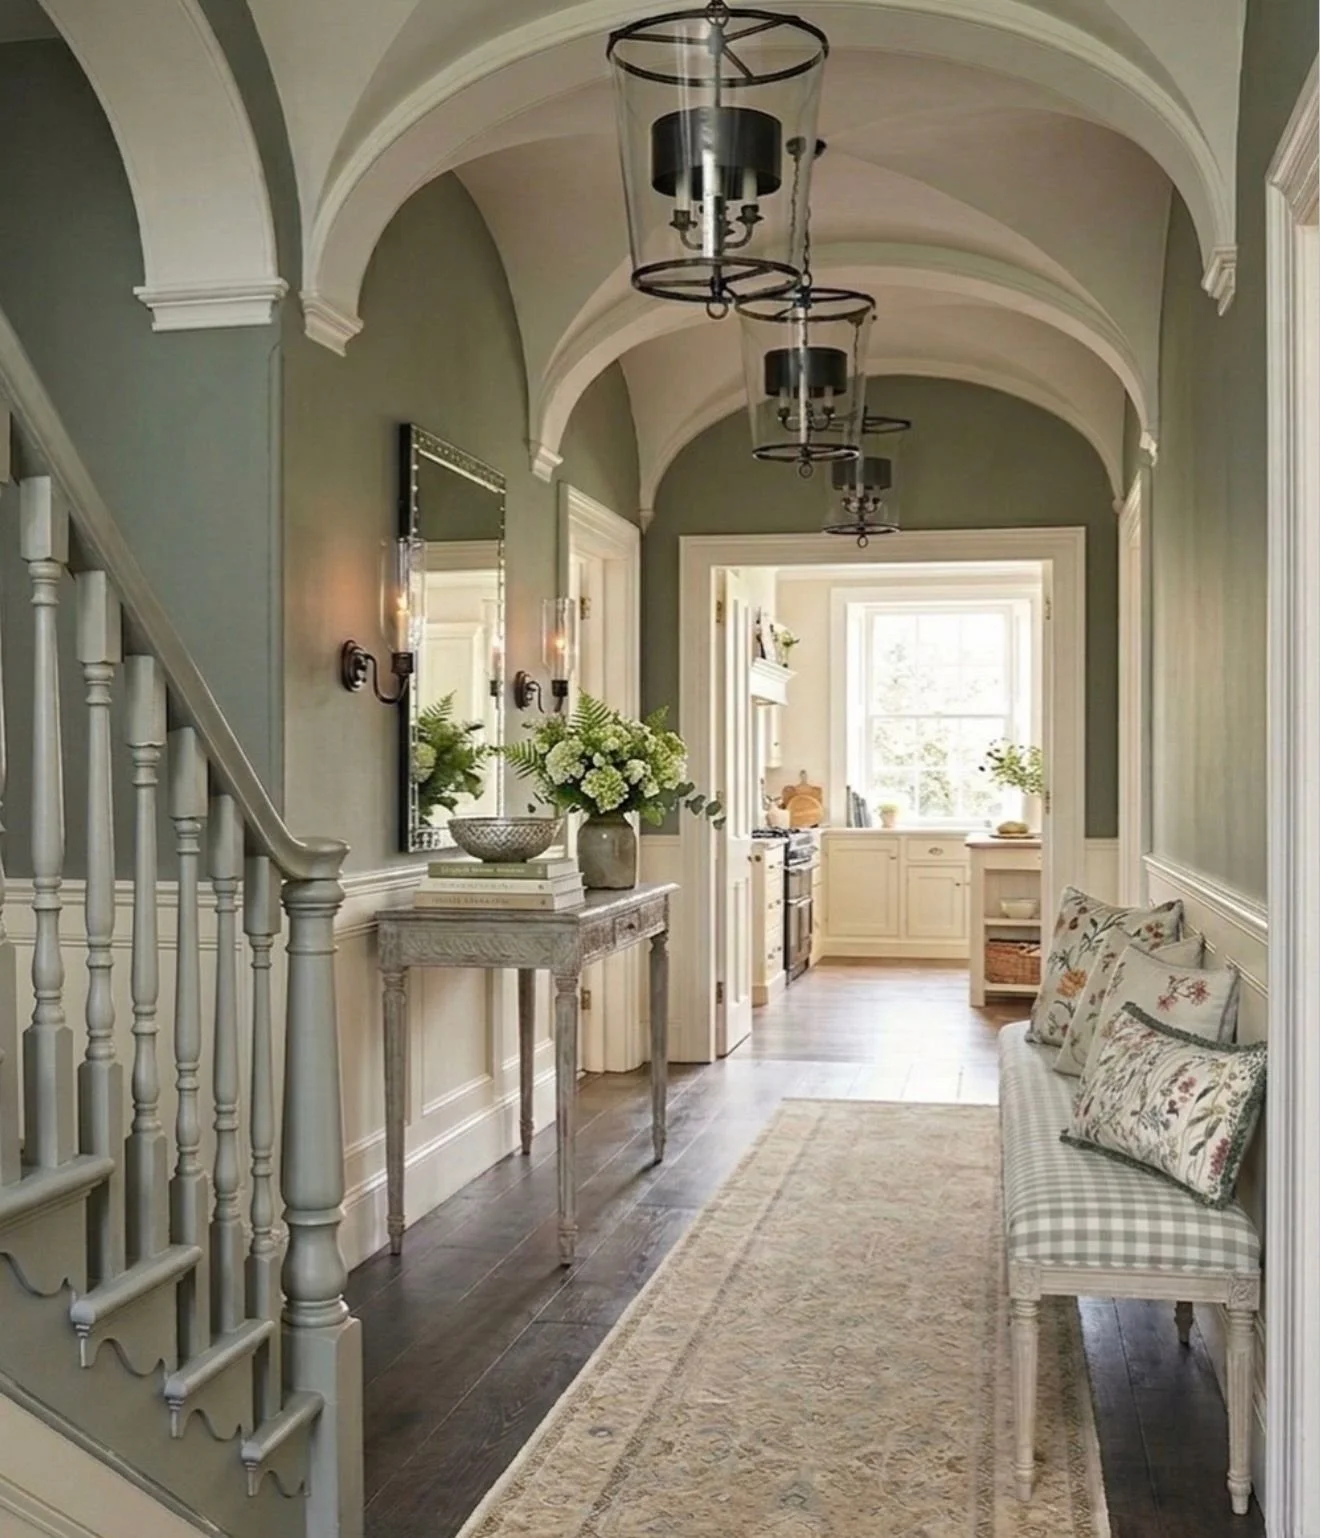
Entrance hall design by The Layered Look
Navigating the lighting aisle in British supermarkets or DIY shops can feel rather like decoding a secret language. To completely avoid that bright white, clinical office feel, you only need to look for two key specifications on the packaging: Kelvin (K) and CRI.
The Golden Rule: Look for 2700K (or lower)
The Kelvin scale measures the "temperature" of light. The higher the number, the cooler and bluer the light.
Avoid 4000K–5000K: These are often labelled "Cool White" or "Daylight." Unless you are operating a commercial kitchen, keep these out of your living spaces and bedrooms.
The Sweet Spot (2700K): Look for bulbs explicitly labelled "Warm White" at 2700K. This mimics the gentle, inviting glow of classic incandescent bulbs.
The Ultra-Cosy Option (2200K–2400K): For bedside tables, reading nooks, or decorative filament bulbs, drop down to a "Very Warm White" for a beautiful, candle-lit amber glow.
The Secret Weapon: High CRI (90+)
CRI stands for Colour Rendering Index, measured from 0 to 100. It dictates how accurately a bulb reveals the true colours of your furniture, fabrics, and paint. Most standard bulbs have a CRI of around 80, which can leave a room looking a touch flat or washed out.
Designer Tip: Seek out LED bulbs with a CRI of 90 or above. Your paint will look richer, your wood grains will look deeper, and the entire room will feel distinctly premium.
Fitting Types to Note
Keep a quick note on your phone of your light fittings before you shop. In the UK, you will primarily run into:
B22 / BC: The classic British bayonet (push and twist).
E27 / ES: The large Edison screw, common in modern lamps and pendants.
GU10: The standard twist-and-lock spotlight bulb used for downlights.
Next time you are tempted to hit the main wall switch, pause. Walk around the room, turn on three low-level lamps instead, and watch your space completely transform.
Should you require help mapping out a bespoke lighting and colour scheme for your home renovation, please do get in touch with our design studio to book a consultation.